To build your own Arduibag remote control case, you must first determine on which side of your bike handlebar it should be fixed (Left or Right).
Then you have 2 options: you can either download the 3D files to print the case yourself or you can print it via a third party (like Sculpteo).
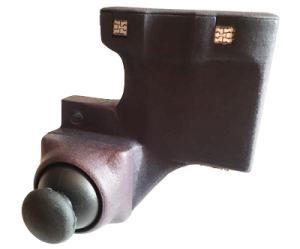
Warning: The 3D model of the Arduibag remote control that you can download below is designed to be fixed to your bike’s brake lever. However, please notre that we haven’t checked if it is adapted to any type of brake lever.
So, we have included a modification that can be activated if you need to install the remote control on your bike’s handlebar. If the template below doesn’t fit on your bike, you’ll probably want to change the 3D model using this procedure.
Print the case yourself: download 3D files
MTL and OBJ files
Download this ZIP Archive where you’ll find all 3D files (MTL and OBJ) for your 3D printer.
Pleaser refer to you 3D printer manual to learn how to use these files.
Print via Sculpteo
You don’t have any 3D printer? You need a beautiful Arduino remote case? Then use these ready-to-buy 3D printed Sculpteo models:
| Main body | Joystick cover | Top cover |
|---|---|---|
| Buy left hand main body |
You’ve received or printed the 3 parts of your Arduibag remote control? Nice! Now, you are ready to prepare the case.